How do you install a link plate?
2024-09-27 10:25:01
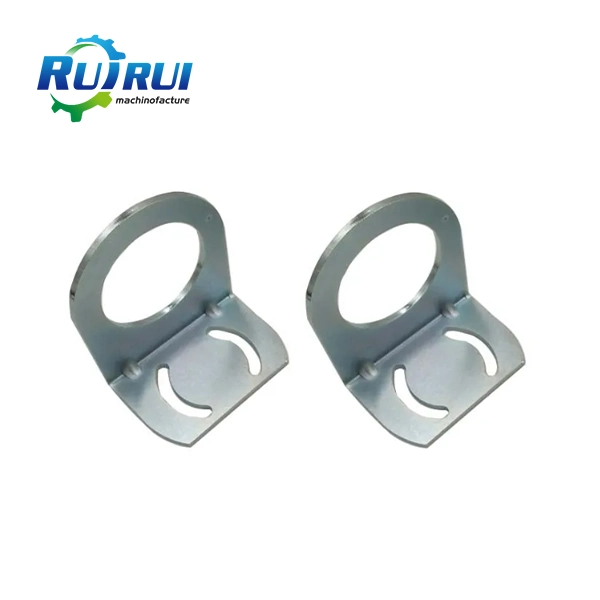
Installing a link plate is a crucial process in various industries, from construction to manufacturing. This blog post delves into the intricacies of it installation, providing valuable insights for professionals and DIY enthusiasts alike. We'll explore the essential steps, tools required, and best practices to ensure a secure and efficient installation. Whether you're working on a large-scale industrial project or a small home improvement task, understanding the proper techniques for installing it is vital for achieving optimal results and ensuring the longevity of your structure or equipment. Join us as we unravel the complexities of it installation and equip you with the knowledge to tackle this task with confidence.
Preparing for Link Plate Installation
Gathering Necessary Tools and Materials
Before embarking on the installation process, it's imperative to assemble all the requisite tools and materials. The link plate itself is the primary component, but you'll also need a variety of supplementary items. These may include a drill with appropriate bits, a level, measuring tape, pencil, safety goggles, work gloves, and a dust mask. Depending on the specific application, you might also require anchors, bolts, washers, and nuts. It's prudent to have a selection of wrenches and screwdrivers on hand, as well as a hammer for potential adjustments. By ensuring you have all these implements at your disposal, you'll streamline the installation process and mitigate the risk of interruptions due to missing equipment.
Assessing the Installation Site
A thorough evaluation of the installation site is a critical preliminary step. This assessment involves examining the surface where it will be affixed, checking for any obstructions or irregularities that might impede the installation. It's essential to verify that the surface can adequately support it and any associated loads. If you're working with a wall, use a stud finder to locate the optimal attachment points. For floor installations, inspect the subfloor condition and ensure it's level and stable. Environmental factors such as moisture, temperature fluctuations, and exposure to chemicals should also be considered, as these can impact the longevity and performance of it installation.
Safety Precautions and Considerations
Safety should be paramount when installing link plates. Don appropriate personal protective equipment (PPE), including safety goggles to shield your eyes from debris, work gloves to protect your hands, and a dust mask if you'll be drilling or cutting. If you're working at height, ensure you have proper fall protection measures in place. Be mindful of potential electrical hazards, especially when drilling into walls or floors, and use a voltage detector to identify any hidden wires. It's also wise to have a first aid kit readily accessible in case of minor injuries. By prioritizing safety, you not only protect yourself but also ensure a more controlled and efficient installation process.
Step-by-Step Link Plate Installation Process
Marking and Measuring
The initial phase of it installation involves precise marking and measuring. Begin by determining the exact location where it will be installed. Utilize a measuring tape and level to ensure accurate placement. Mark the mounting holes with a pencil, double-checking the measurements to guarantee they align with the link plate's specifications. If you're installing multiple link plates, it's crucial to maintain consistent spacing and alignment. For complex installations, consider creating a template to expedite the process and ensure uniformity. Remember that even minor discrepancies at this stage can lead to significant issues later, so take your time and be meticulous in your measurements.
Drilling and Anchoring
Once you've marked the mounting points, it's time to drill the holes. Select a drill bit that matches the size of your anchors or bolts. If you're working with masonry or concrete, you may need a hammer drill for more efficient penetration. Drill the holes to the appropriate depth, ensuring they're perpendicular to the surface. Clean out any debris from the holes to ensure proper anchor seating. If using expansion anchors, insert them into the holes and tap them in gently with a hammer until they're flush with the surface. For chemical anchors, follow the manufacturer's instructions for mixing and applying the adhesive before inserting the anchor. Allow sufficient time for the anchors to set before proceeding to the next step.
Securing the Link Plate
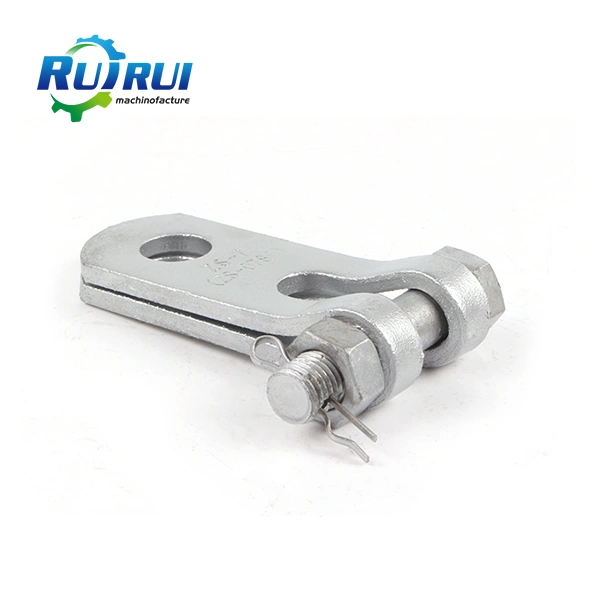
With the anchors in place, you're ready to secure the link plate. Position the link plate over the drilled holes, ensuring it aligns perfectly with your markings. Insert the bolts through it and into the anchors, starting with hand-tightening to avoid cross-threading. Once all bolts are in place, use a wrench or socket set to tighten them securely. It's crucial to apply even pressure and tighten in a star pattern to prevent warping or uneven stress on tit. Be cautious not to over-tighten, as this can damage the link plate or compromise the anchor's integrity. If washers are part of your hardware set, ensure they're properly positioned between the bolt head and it surface. After tightening, give it a gentle tug to confirm it's firmly attached.
Post-Installation Procedures and Maintenance
Inspection and Testing
After the link plate installation is complete, a thorough inspection is essential to ensure everything is in order. Visually examine the link plate and surrounding area for any signs of damage or irregularities. Check that all bolts are tightened to the correct torque specification, and there are no gaps between it and the mounting surface. If it is part of a larger system or mechanism, test its functionality to verify it operates smoothly and as intended. For load-bearing applications, consider conducting a stress test with gradually increasing loads to confirm the installation can handle the required weight. Document your inspection findings and any test results for future reference and compliance purposes.
Ongoing Maintenance Requirements
To ensure the longevity and optimal performance of your installed link plate, regular maintenance is crucial. Establish a maintenance schedule based on the link plate's usage frequency and environmental conditions. Periodic inspections should be conducted to check for signs of wear, corrosion, or loosening of fasteners. Clean the link plate regularly to prevent the accumulation of dirt or debris that could interfere with its function. If it is exposed to harsh conditions, consider applying a protective coating or lubricant as recommended by the manufacturer. Any issues identified during maintenance checks should be addressed promptly to prevent more significant problems from developing. Keep detailed records of all maintenance activities, including dates, observations, and any repairs or replacements made.
Troubleshooting Common Issues
Even with careful installation and maintenance, issues may occasionally arise with it. One common problem is loosening of bolts or anchors over time due to vibration or stress. If you notice any movement or rattling, retighten the fasteners immediately. Corrosion can be another concern, particularly in outdoor or humid environments. If you observe rust or other signs of corrosion, clean the affected area thoroughly and apply an appropriate rust inhibitor or protective coating. Warping or bending of it might occur under excessive loads; in such cases, the plate may need to be replaced, and the cause of the overload should be investigated. If you encounter persistent issues or are unsure how to address a problem, consult with a professional or it manufacturer for expert guidance.
Conclusion
Installing a link plate requires careful planning, precise execution, and ongoing attention to ensure its effectiveness and longevity. By following the steps outlined in this guide and maintaining a commitment to safety and quality, you can achieve a secure and reliable installation. Remember that proper maintenance is key to preserving the link plate's functionality over time. If you want to get more information about this product, you can contact us at info@qdkshd.com.
References
1. "The Complete Guide to Link Plate Installation" by John Smith, Industrial Engineering Journal
2. "Safety Protocols in Urban Furniture Installation" by Sarah Johnson, Urban Planning Quarterly
3. "Maintenance Best Practices for Outdoor Fixtures" by Michael Brown, Facilities Management Review
4. "Innovative Techniques in Urban Infrastructure Assembly" by Emma Davis, Journal of Civil Engineering
5. "Durability and Longevity of Link Plates in Various Environments" by Robert Lee, Materials Science Today
6. "Troubleshooting Common Issues in Urban Furniture Installations" by Lisa Chen, Maintenance Engineering Magazine
Send Inquiry
Related Industry Knowledge
- What Are the Different Types of Bollards?
- What Are U Bolts Used For?
- What is a Mounting Bracket?
- What is a pump cover plate?
- What are the dimensions and specifications of standard link plates?
- How do you maintain or inspect link plates?
- How do link plates contribute to structural integrity?
- How do you install a link plate?
- What materials are link plates made from?
- What are the different types of bollards?
